The shape of Nerfs to come - how a Nerf Demolisher was repainted
Here is a breakdown of my work on a Nerf Demolisher. You'll notice I don't take it apart to paint. I don't because I didn't know just how big the V symbol on the side would be as this was my first attempt.
This is what the Nerf Demolisher starts out as. I begin sanding off all the Nerf logos, the white paint stripes and the black warning stripes on the 'grenade launcher.' When new paint is sprayed on this white paint it sometimes reacts and becomes blotchy. Same with the smooth parts of the plastic body. Finishing with wire wool to smooth it out. Just beware that the dust and wire wool from sanding get everywhere. A paint brush helps to clean it all off the gun.

Spraying is next. I spray a grey undercoat, making sure its all even and then matt black on the parts that will be become 'worn steel'. With Nerfs of this size (and weight) where and how they dry can be an issue. I spray them one side at a time giving plenty of time to dry if I'm being very cautious. I do have a place to hang them from an S hook, but the size and weight of this put me off.

This picture skips one of the hardest parts of painting Nerfs. Masking tape. All the parts I had painted black I now had to mask off so I could paint the body white. On this piece it is the handgrip and the barrel. Parts of the barrel are recessed inside the front of the body so that means cutting small pieces of masking tape and placing them there, building them up so they cover what needs to be covered.
On the handgrip you'll notice I use a plastic bag. Helps cover a large surface quickly.
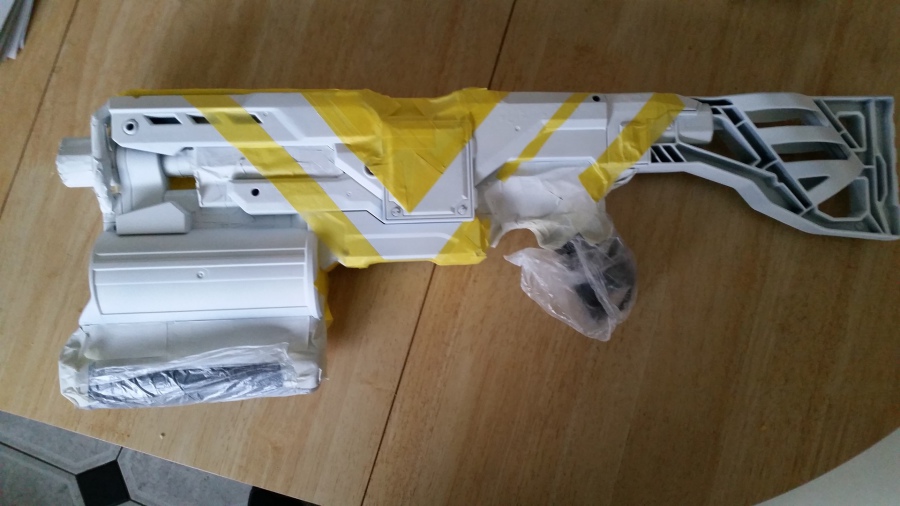
Next is masking off again to create the VI on the body. Measuring out and then using Frogtape for the job. This stuff really does stop any bleed from spray paint, just as long as you spray lightly in several coats. One of the problems here is the surface is not flat. There are lots of indentations of various depths all over this body means that the tape has to be recut and remeasured to follow these indentations while trying to keep the shape.

More masking now to get ready for spraying. More plastic bags to cover the large surface area. Just have to make sure the bags are taped on tight so no spray gets through and onto the white body. It's a lot of work and it's only halfway there.
I've also planned ahead with the masked off top of the V. This can be removed but will leave the straight line of the V intact. It should become clearer later.
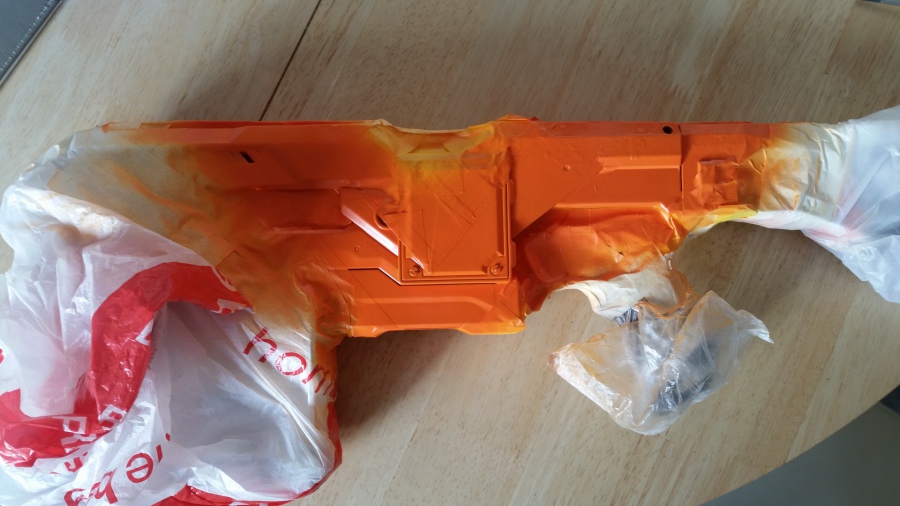
Spraying finished. It was done in several light coats to help protect from possible bleed through any masking tape.
Now the orange paint is dry, I've removed the masked off top of the V so it can be sprayed black. More plastic bags are brought into use here. Again it is several light coats to make one solid one.
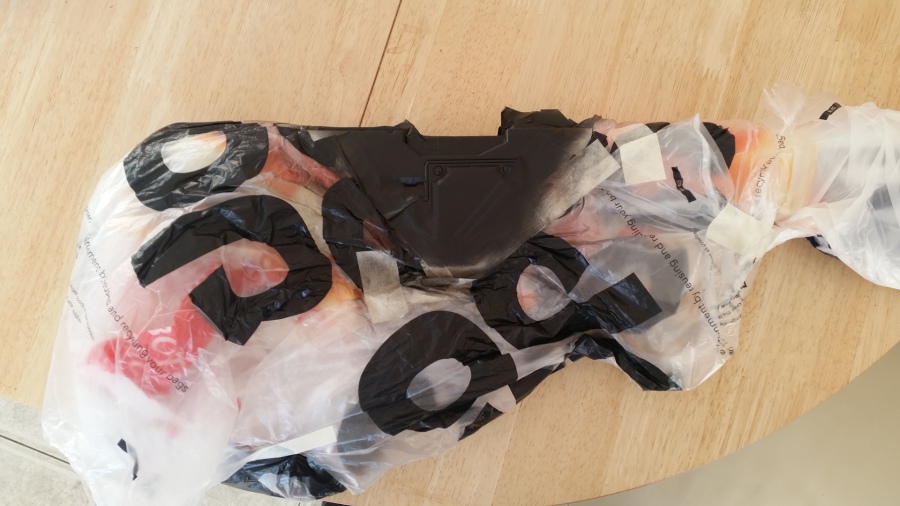
All masking tape finally removed. And there was a LOT of masking tape. Removing it is a slow process to make sure it doesn't pull any of the paint off with it. The only tape you see here is keeping the grenade launcher plunger in place. You can finally see the design I was going for.
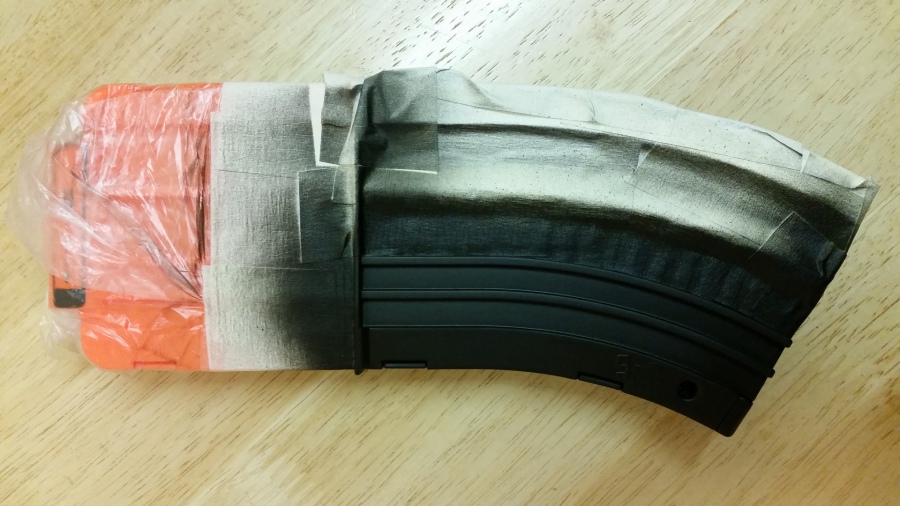
Next I gave the magazine a two tone look to match the black and white of the body. Took time to do but gives a great effect.

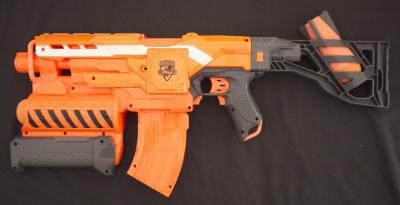
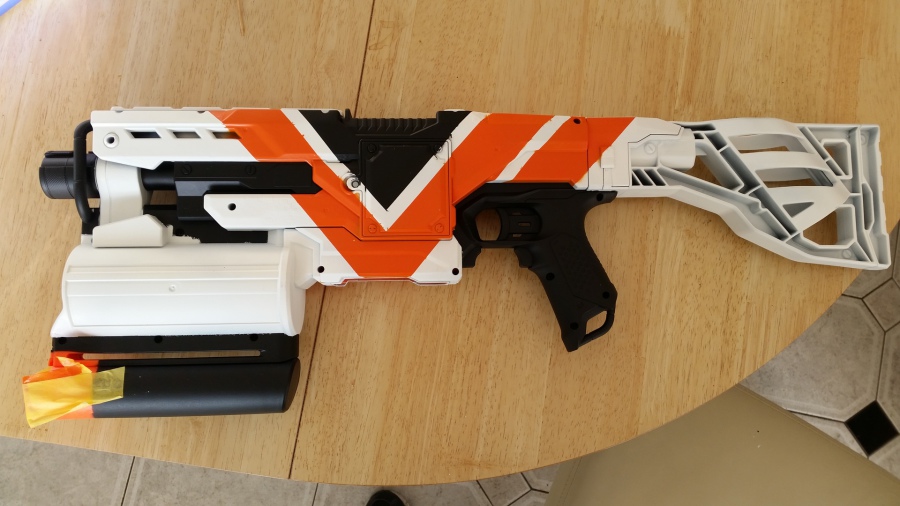
And here is the final result. Grenade launcher put back in place and the entire piece all detailed up, weathered and sealed in a satin finish. So much work but looks so impressive. And because I never took it apart it still fires!