CS:GO AWP Asiimov repaint
 CSGO AWP Asiimov
The most expensive item I ever repainted was an airsoft rifle.
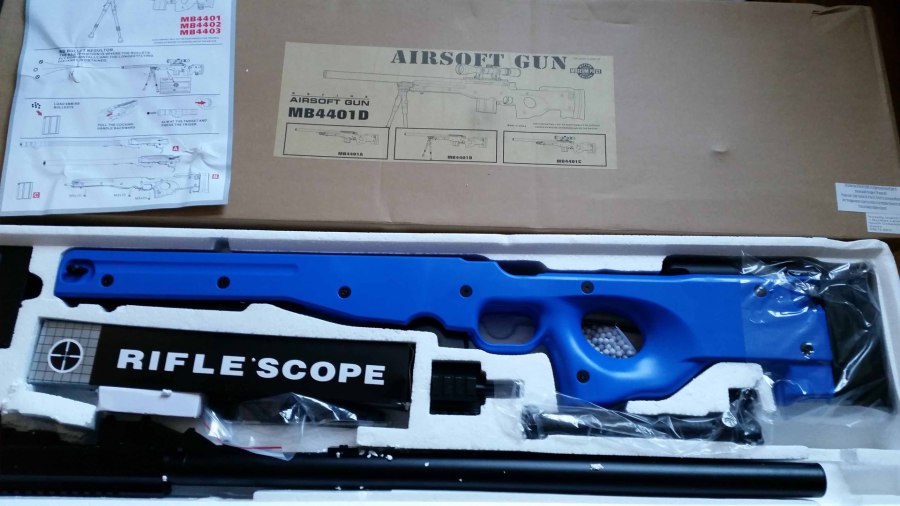
The AWP Asiimov from Counter Strike Global Offensive is a fantastic sniper rifle with a striking colour scheme. In real life it looks even better. This is a full size repaint of an airsoft rifle into the Asiimov. White body with orange highlights with black lines. This was originally an MB4401D airsoft rifle with a blue body. Just wish I had taken more photos of it in its original colours before I went to work on it.
I don't really do airsoft paint jobs as they're far more expensive than Nerfs and there is no room for error. This has been THE scariest work I've ever done.
Barely any hand painting on this, it is mostly spray paint. This meant lots of masking tape in lots of layers to make sure no paint bleeds through to the base colour and several light sprays of the paint to build up the colour.
The thin black lines on this were 2mm wide and the one I did at the mid of the barrel matches just about exactly with the line running around the body which is a tiny little detail I'm so happy with. Painting black and orange on a white base will show up any errors you make, so lots of double and triple checking of the masking tape.
I made a very long YouTube video showing this entire process but I have also listed it step by step below:
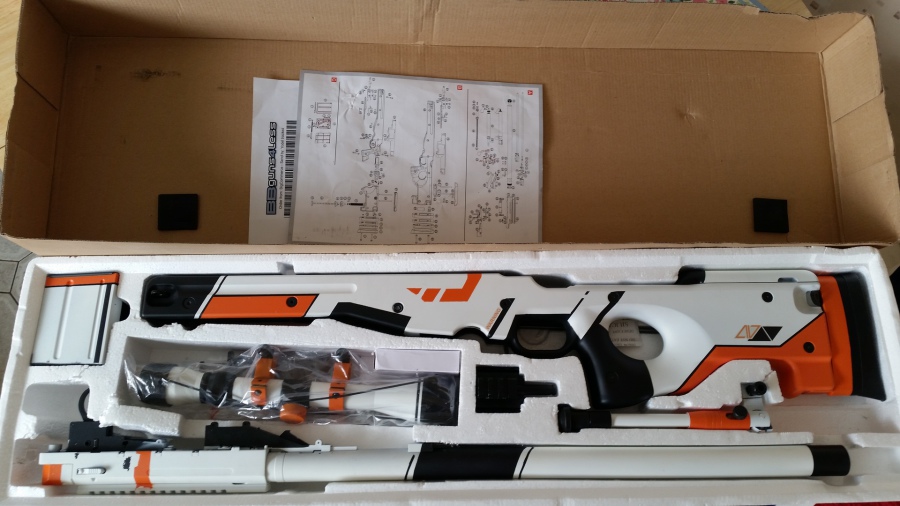
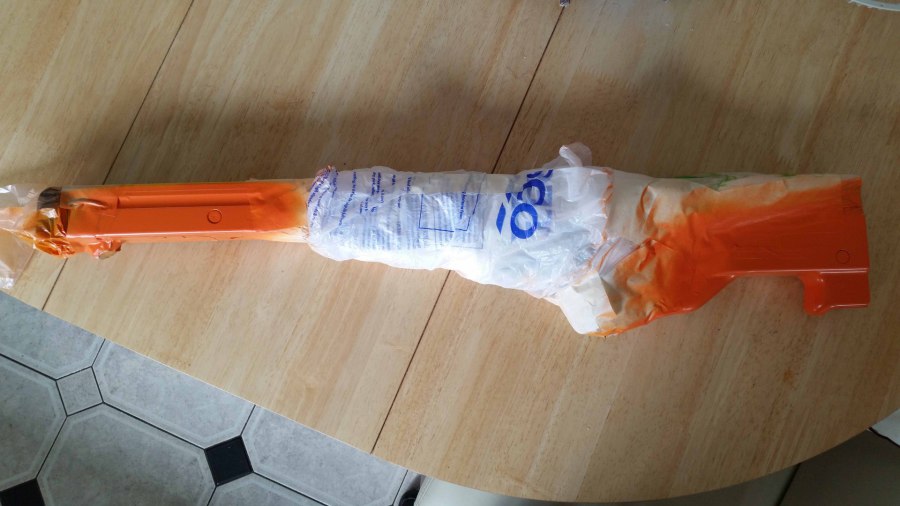
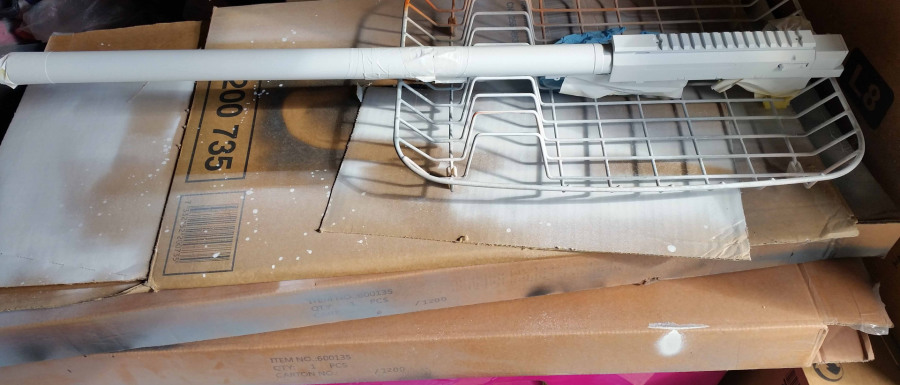
The original packaging and look of the airsoft rifle.
Designing the colour scheme & how to recreate it
The Asiimov is made up of three colours; a white body with black and orange areas, some big and boxy and others long slim lines standing on their own and also as a border between the two other colours. I looked at a lot of pictures of the AWP Asiimov before beginning this. I even measured out the angles to get it as accurate as possible.
This colour scheme will be a multi stage process:
1. Painting the white body
2. Measuring, masking and painting the black details
3. Measuring, masking and painting the orange details
4. Measuring, masking and painting the border colours
5. Creating and adding decals
6. Spraying with sealer to protect the completed rifle.
And then doing the same with the barrel, bipod and telescopic sight.
Painting the Asiimov
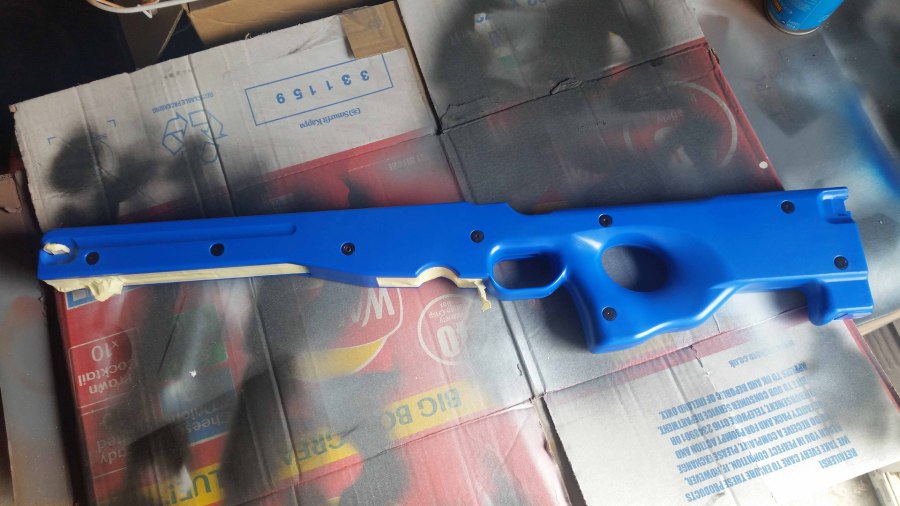
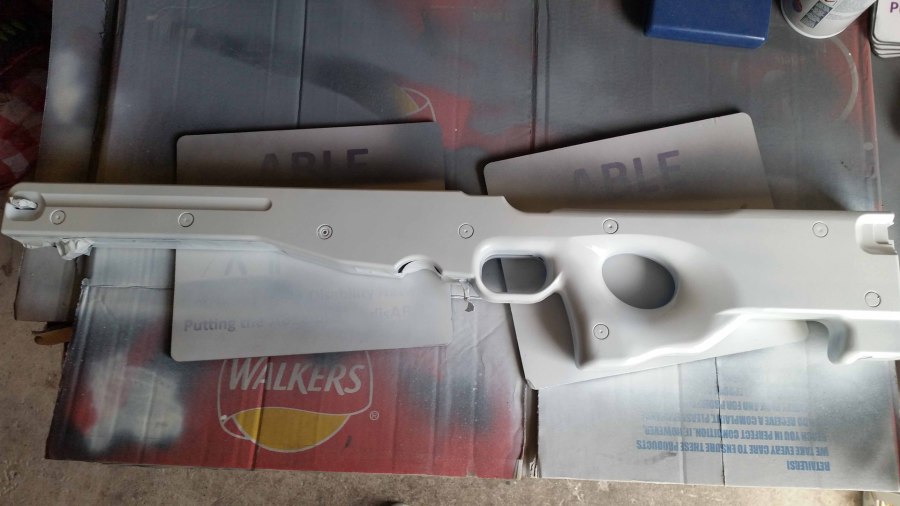
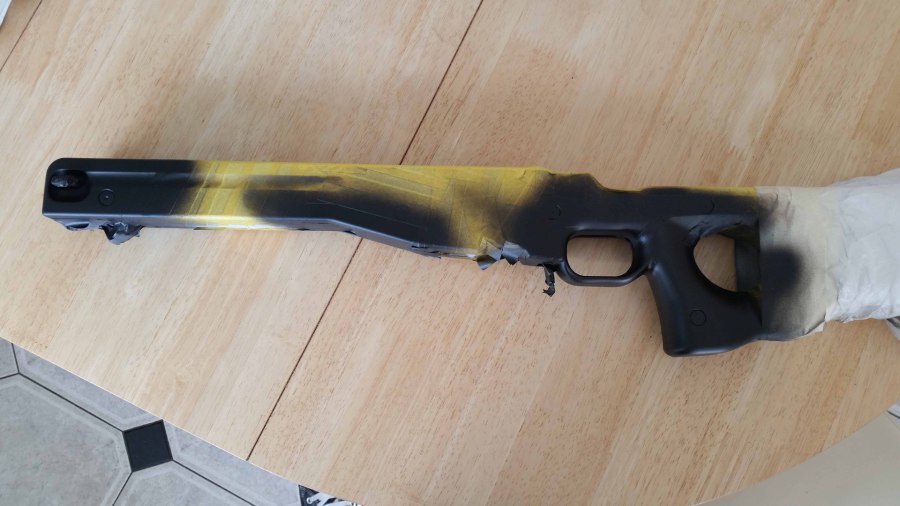
The body ready for painting. All metal parts and the interior that I don't want painted are masked up. The eight bolts along the body of the gun are covered in Humbrol Maskol, a liquid latex which means I can spray over it and just peel it off revealing the clean, black bolts underneath.
Two coats of grey primer and three coats of white paint later....
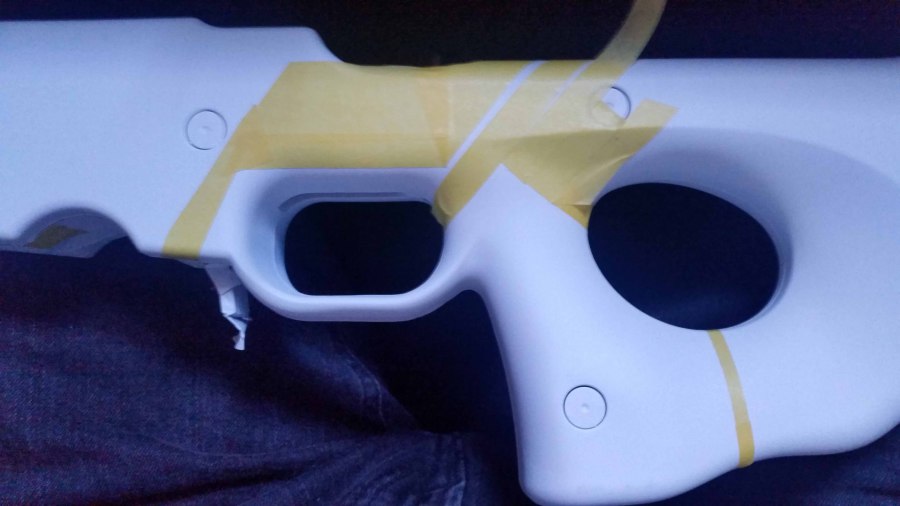
With plenty of time for each coat of white paint to dry completely, this pic shows the careful measuring out of masking tape. The space left to allow the black paint to create its line was measured out (3mm if I remember correctly) and angles carefully measured so this can be repeated on the other side for the design to match. This was the most critical part of the entire process.
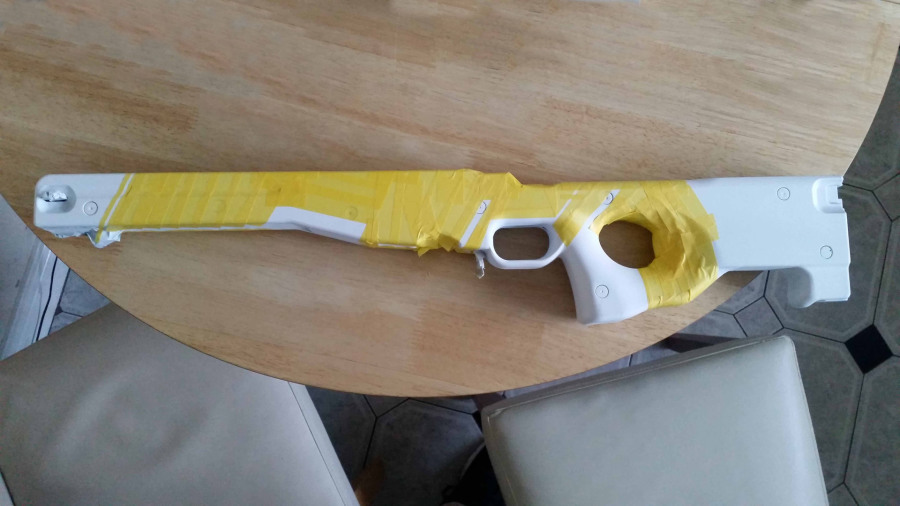
Full masking up is complete. Everything measured out on both sides and many layers of masking tape to prevent bleed through of spray paint.
Light passes of spray paint used to build up the colour.
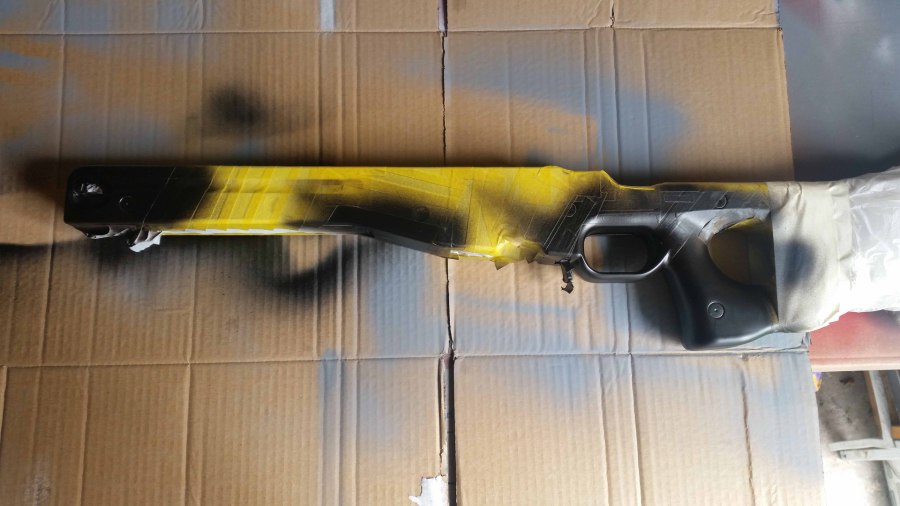
Three very light coats of black paint so as not to bleed through the masking tape later...
The masking tape to the rear is removed. No bleed of the paid and nice clean lines.
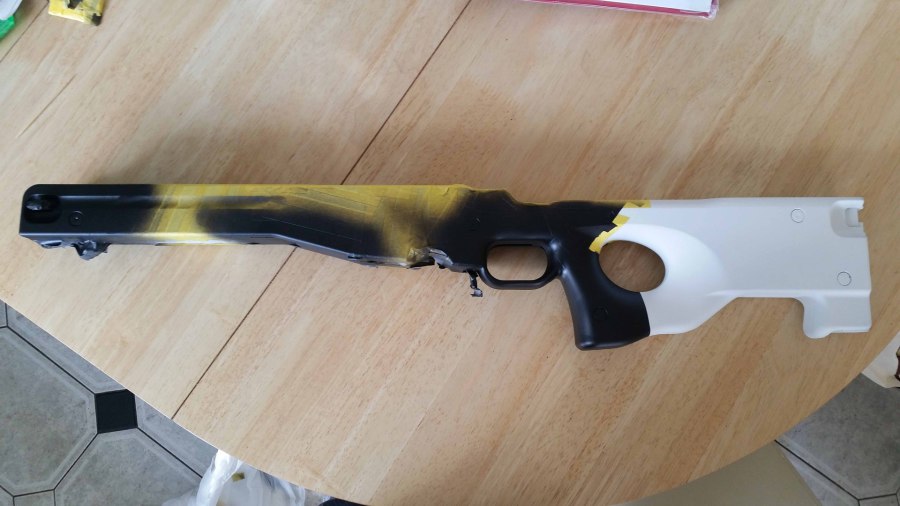
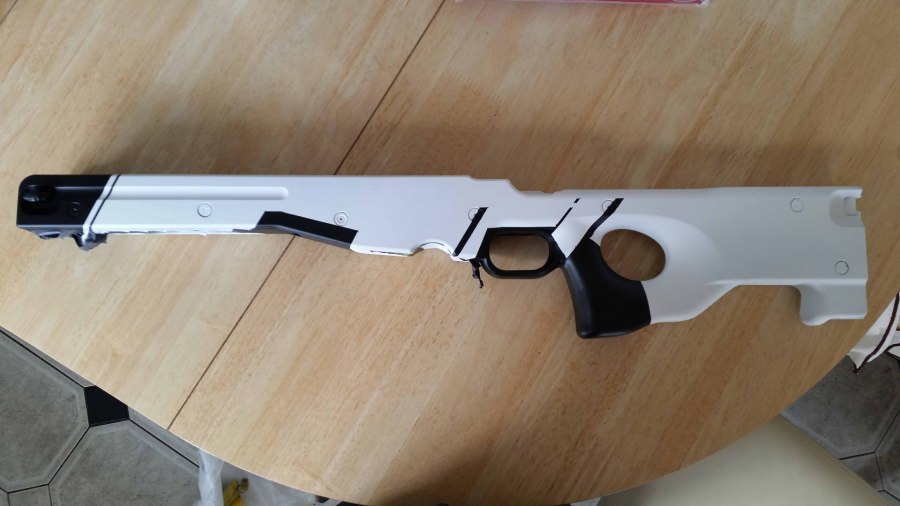
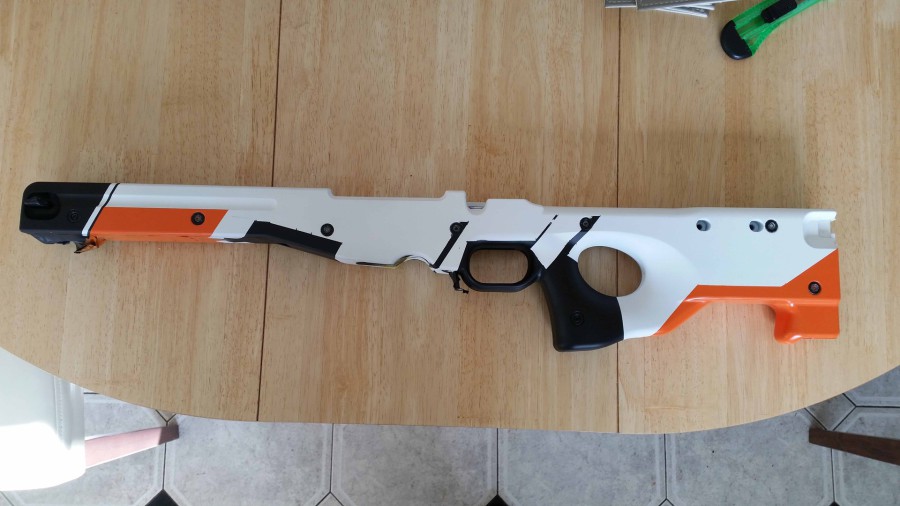
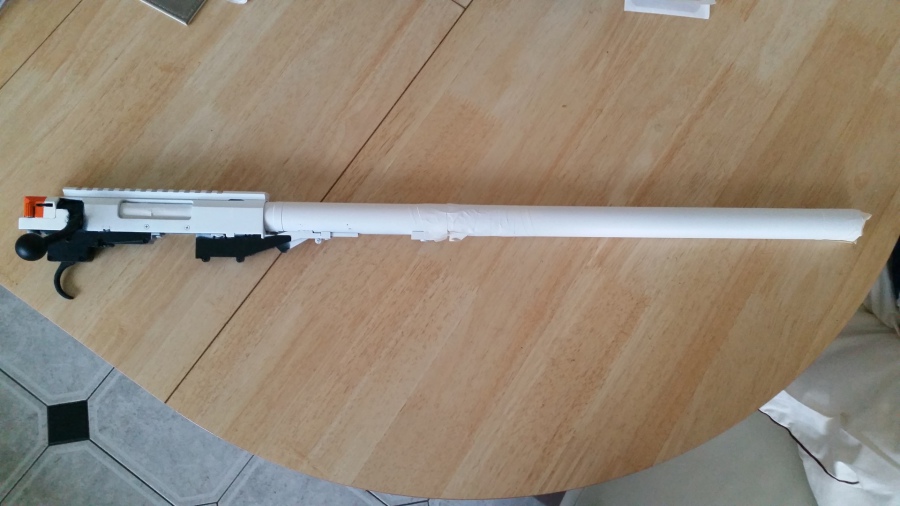
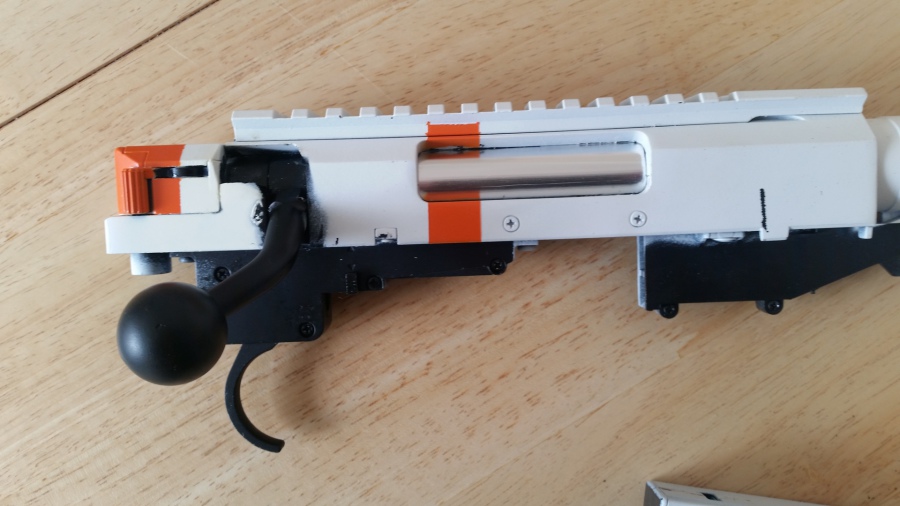
All masking tape removed. Nice clean black lines throughout. Four vertical lines of two different widths rising away at the same angle. The line rising from the trigger guard has a small spacing in it.
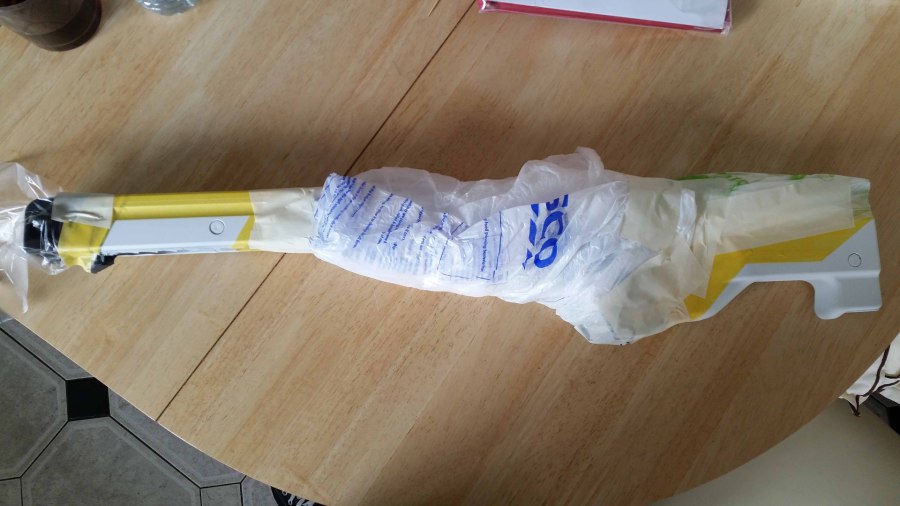
Fresh masking tape to now add the orange detailing, again measured carefully so it matches on the other side. As this will be on the foregrip and lower back only at this stage, I used a plastic shopping bag used to protect the middle of the body. The detailing here will be done seperately.
Several light passes of orange spray paint used to build up the colour.
Orange masking tape removed and again nice clean lines.
Look at the underside of the foregrip showing how the masking tape on each side matches the other.
With body detailing not completed yet, the barrel is put in place to see what parts need to be masked up as this will be painted white with a black detailing.
With working parts protected, masking tape is used at the front of the barrel and at the midpoint to keep the original black which I have measured up with the body to match the designs on that. Several layers of white paint then added. Half of the rear bolt was then further masked to add an orange highlight.
With working parts protected, masking tape is used at the front of the barrel and at the midpoint to keep the original black which I have measured up with the body.
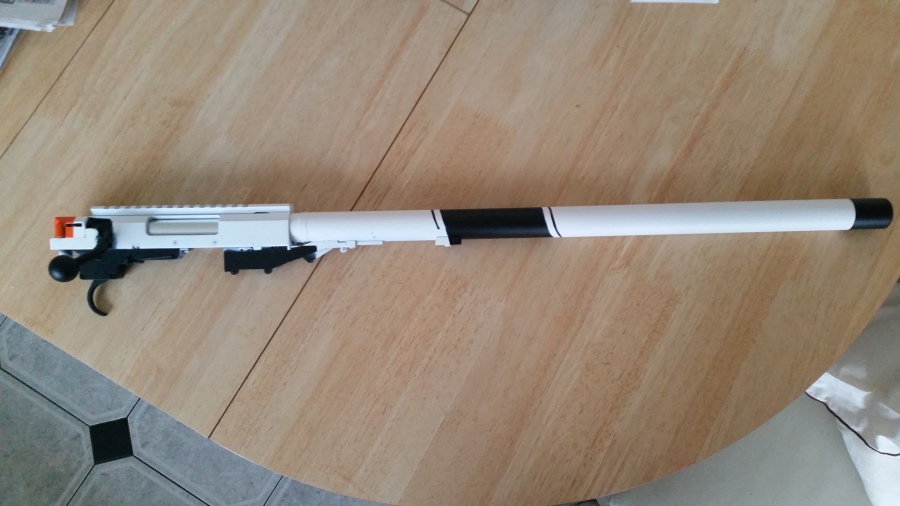
All masking tape removed showing the completed paint scheme. Straight vertical line used at the front of the barrel, and the angled mid point with two smaller lines.
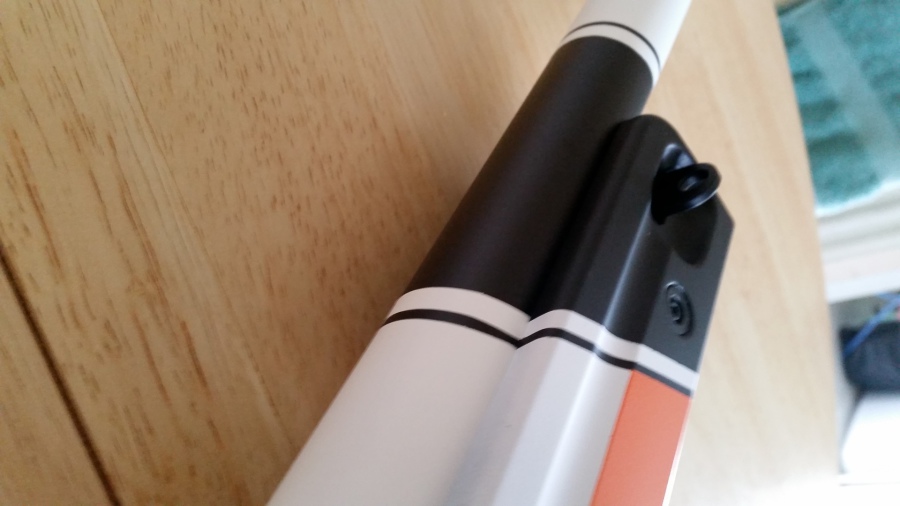
Close up from below of the barrel mated to the body showing how they match after careful measuring.
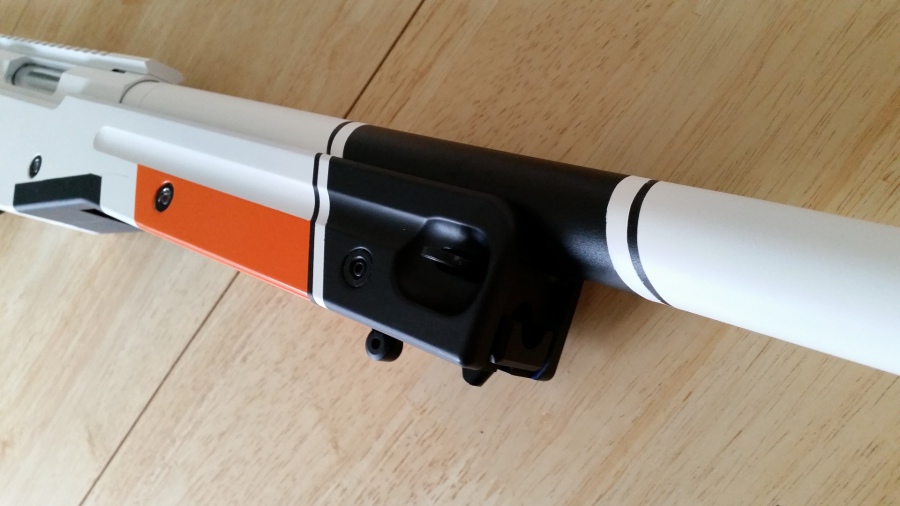
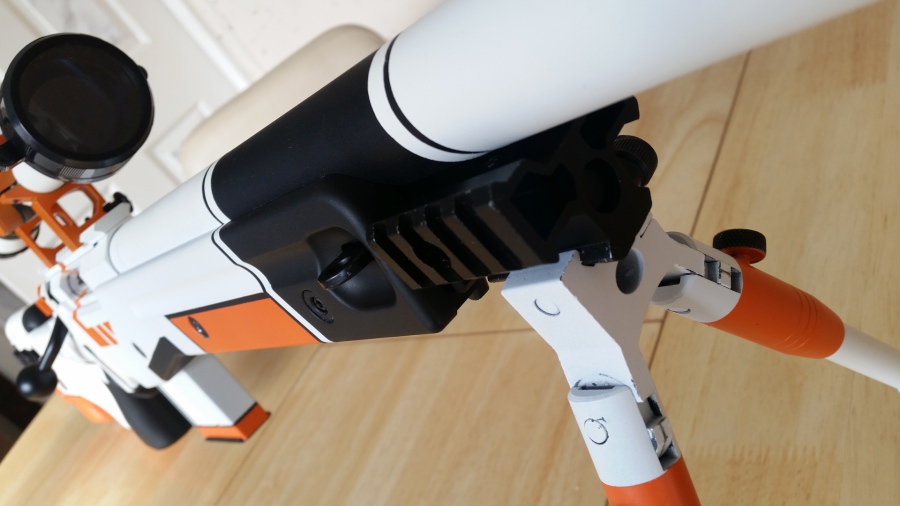
Close up from above the barrel mated to the body giving an even better view how they match after careful measuring.
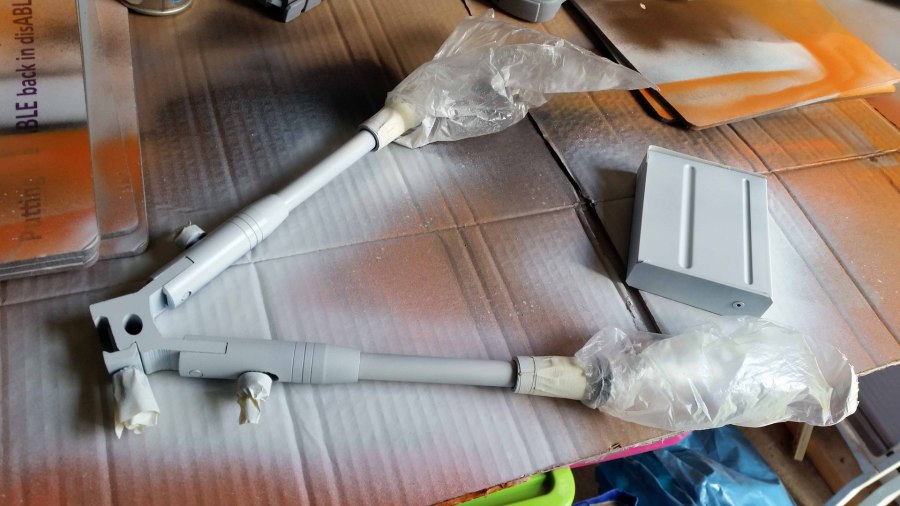
The bipod and magazine now painted white, with the black rubber feet of the bipod procected by plastic bags.
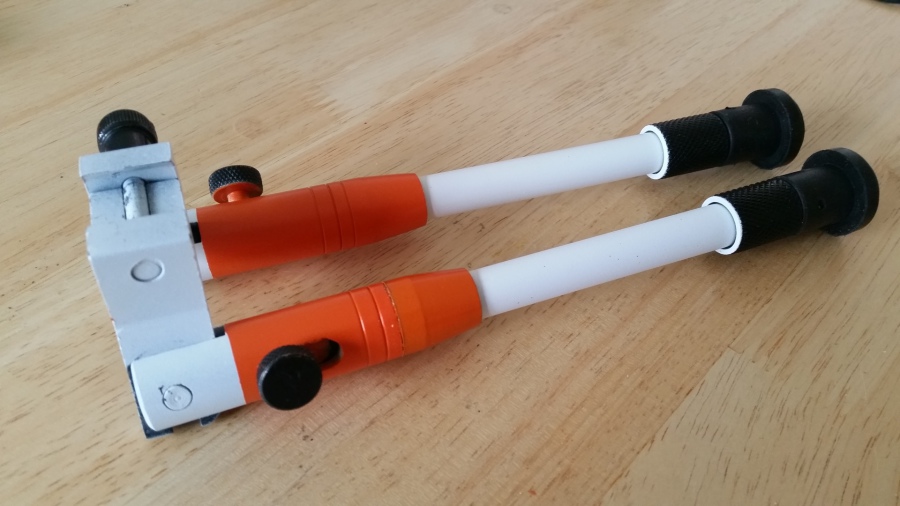
The completed bipod. White body with orange upper legs and original black rubber feet.
The magazine has a white body with black base plate, horizontal orange stripe at the bottom and vertical black stripe. Again each colour was sprayed seperately. The extra challenge is that the vertical black needs to match up with the angled black stripe on the rifle body.
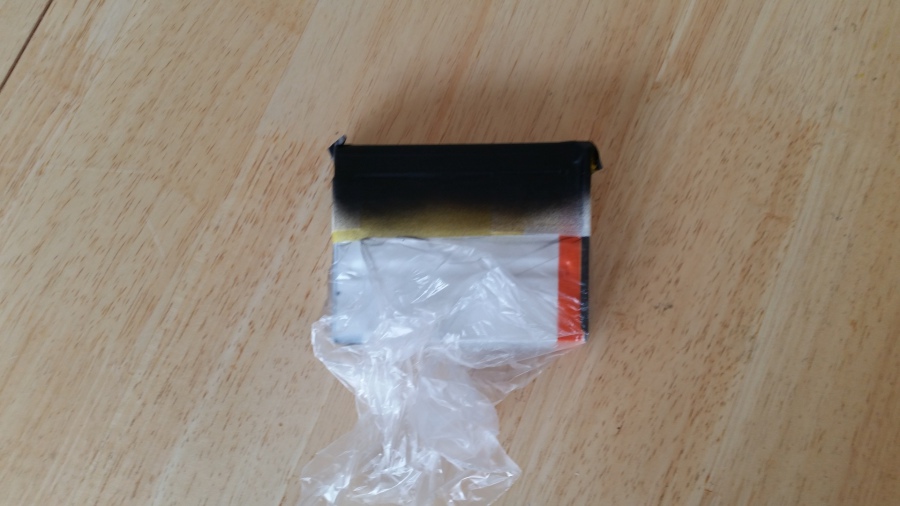
Here is the magazine in its completed colours in this blurry photo.

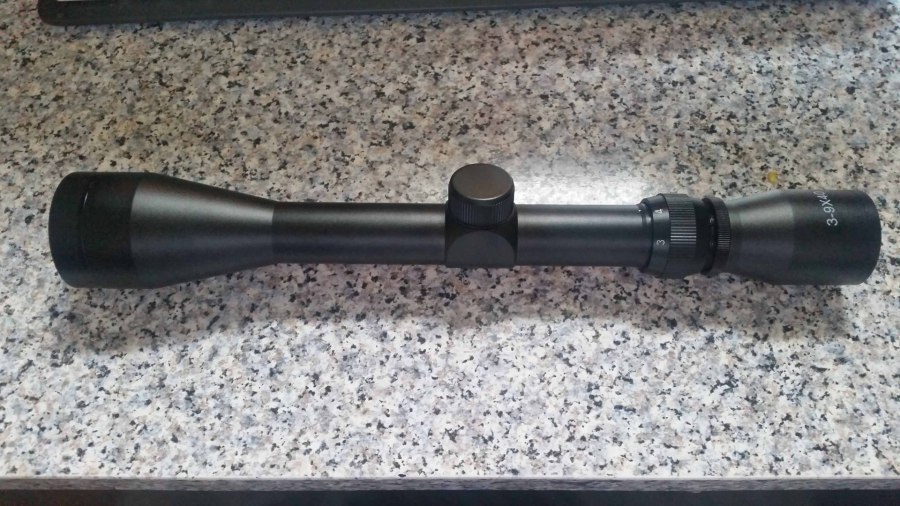
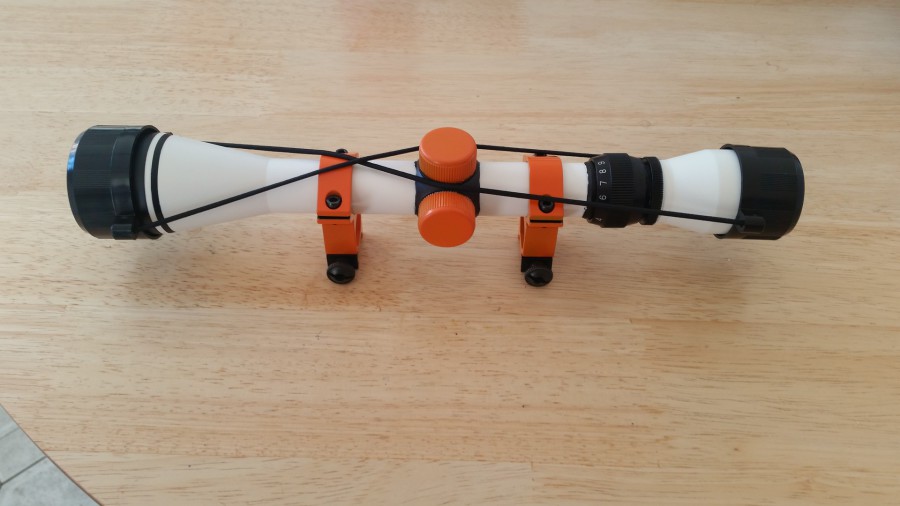
Next stop is the scope and mount. The Asiimov scope has a white body with a thin black stripe toward the front. The mounts are orange.
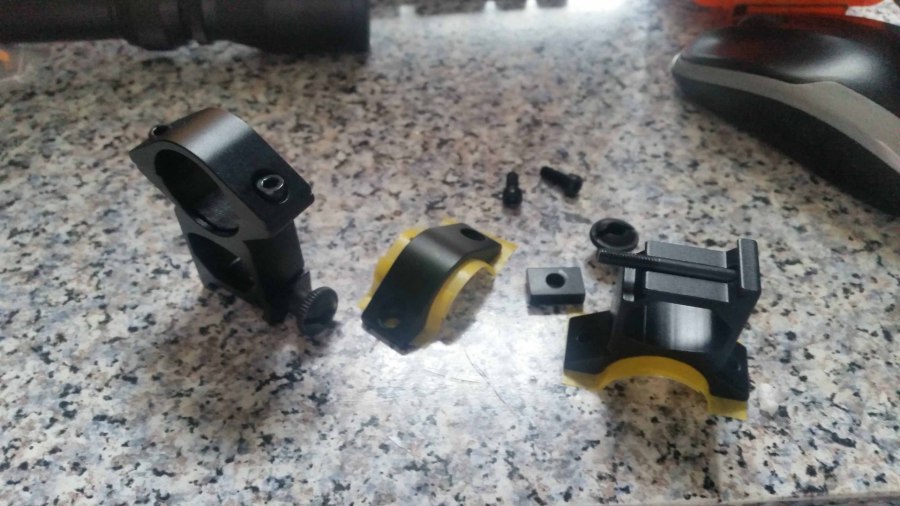
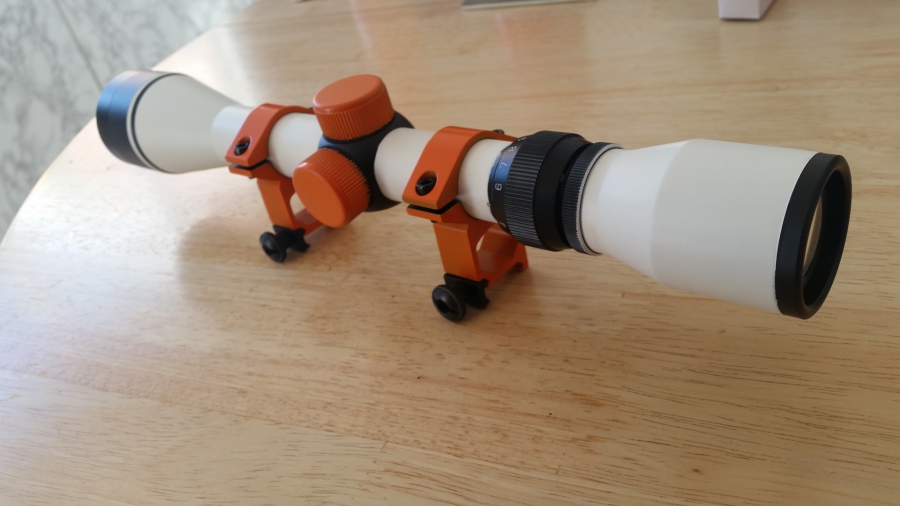
The mounts are going to be all orange with the screws left in their original black. I covered insides of the mounts to keep them in the original black so no orange paint would rub off onto the white body of the scope.
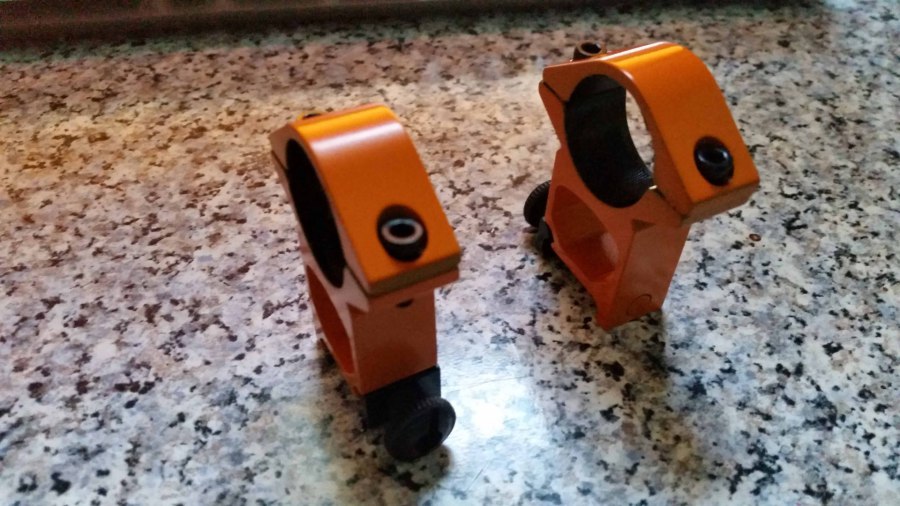
And here they painted orange with the black screw points standing out far better than I had hoped.
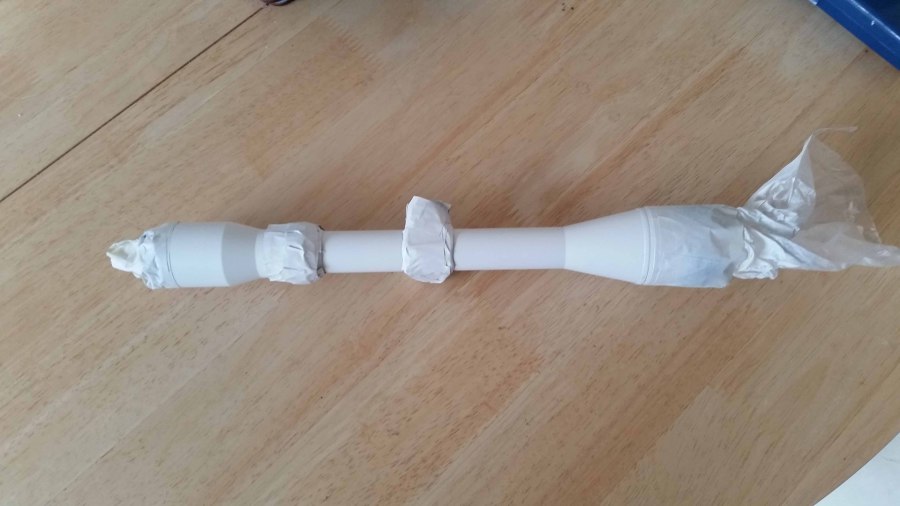
Here is all the masking on the scope. Rear eyepiece, front lens and sight adjustment points are protected by lots of masking tape. Measuring out the thin black ring at the front of the scope was very difficult.
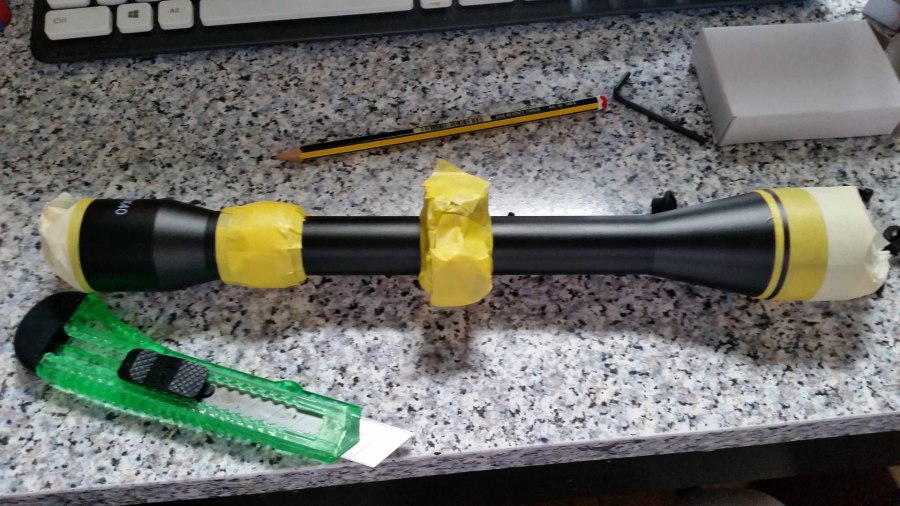
Again, several light coats of white paint to build up the colour and (hopefully) not bleed past the masking tape.
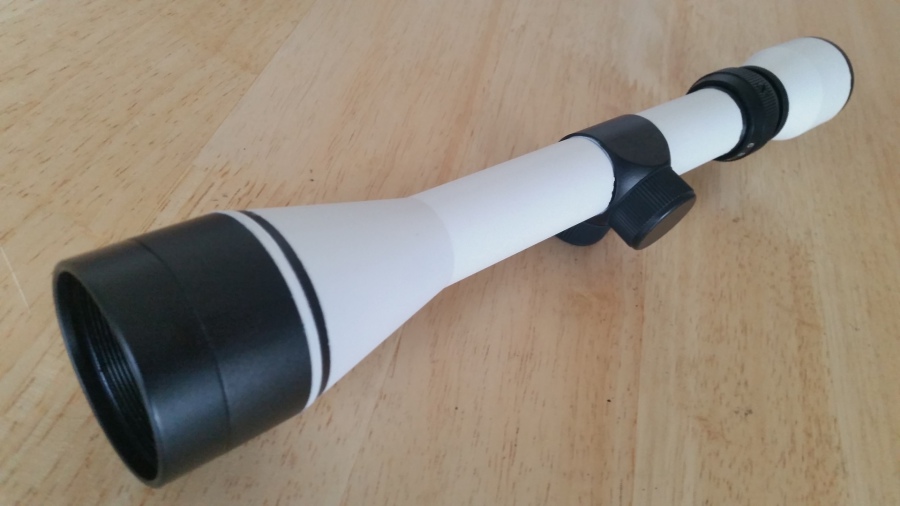
And here it is with all the masking tape removed. Again the two tone scheme really looks good. Very happy with that thin black stripe at the front as well.
The caps covering the sight adjustment points painted orange.
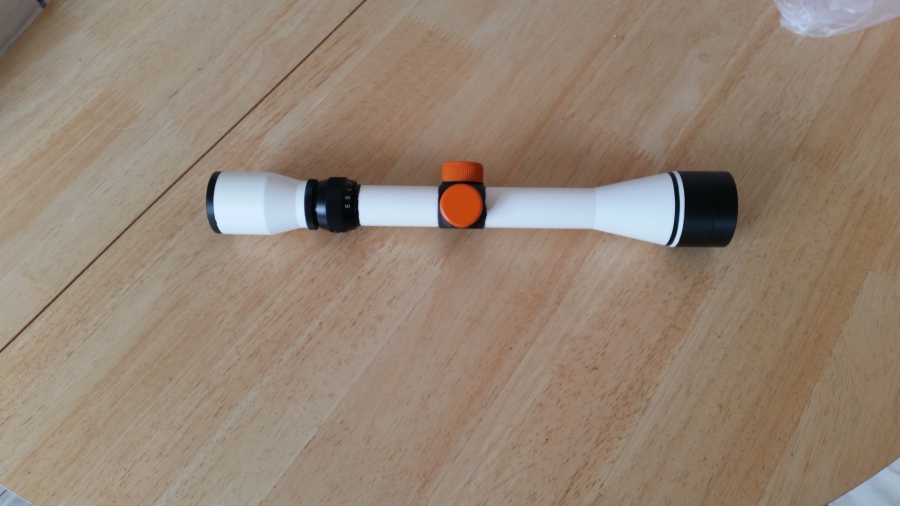
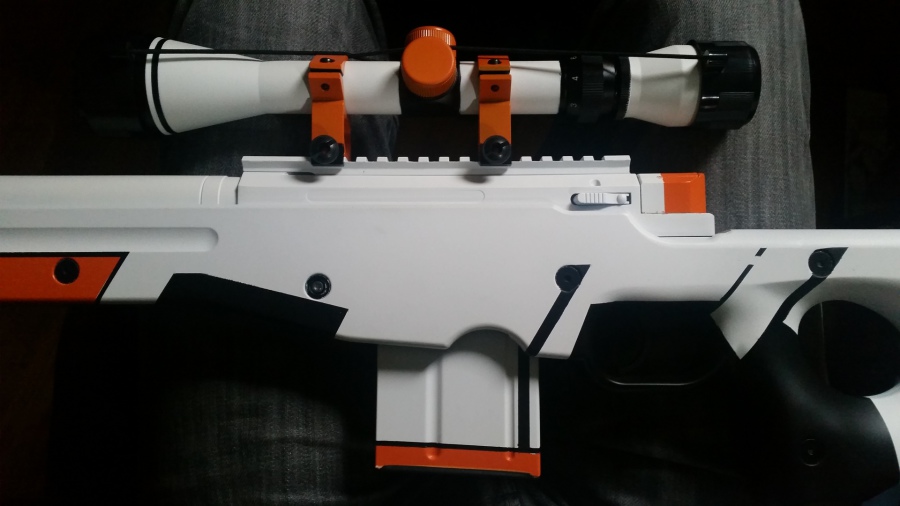
And here are the scope and mounts all back together....
And here with the lens caps attached.
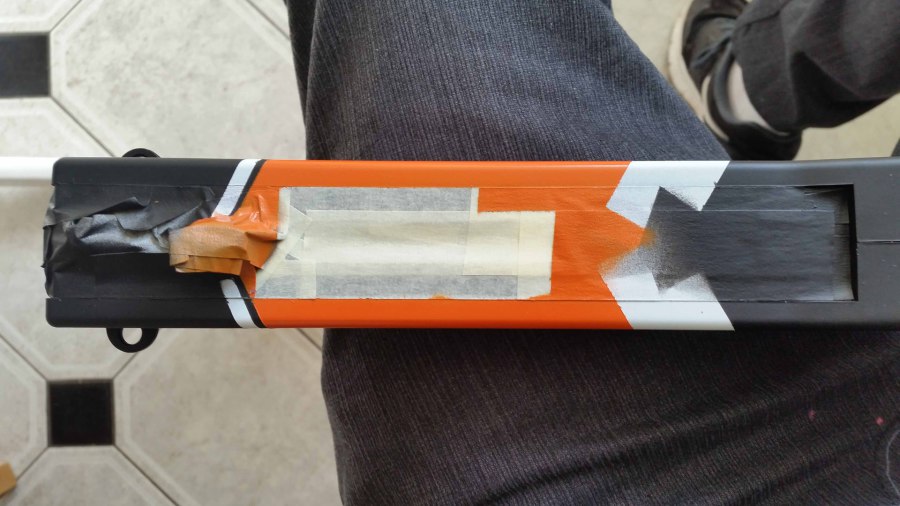
Here is the black border line being added above the orange sections on the lower half of the rifle body. This was hand painted using Citadel model paint and to get the lines nice and straight that my hand painting just can't do, I masked off the a 3 millimetre line across both. The worry here was either lifting the orange paint off, the white paint or possibly both. Luckily the Frog Tape I use is very low tack.
With the magazine finished, I put in in the well and the two lines match u pretty well. The right position for the scope on its rail needs to be figured out as an orange line needs to come down the rear mount and onto the body. Seamlessly if I can again get the measurements right.
Here the working parts are absolutely covered in masking tape and orange paint sprayed. Again several thin layers to build up the colour.
And with all the tape removed. Here you can see that the orange has bled through in parts. The orange paint is very watery and I must have spray just for that bit too long. This will be painted over using Citadel paints.
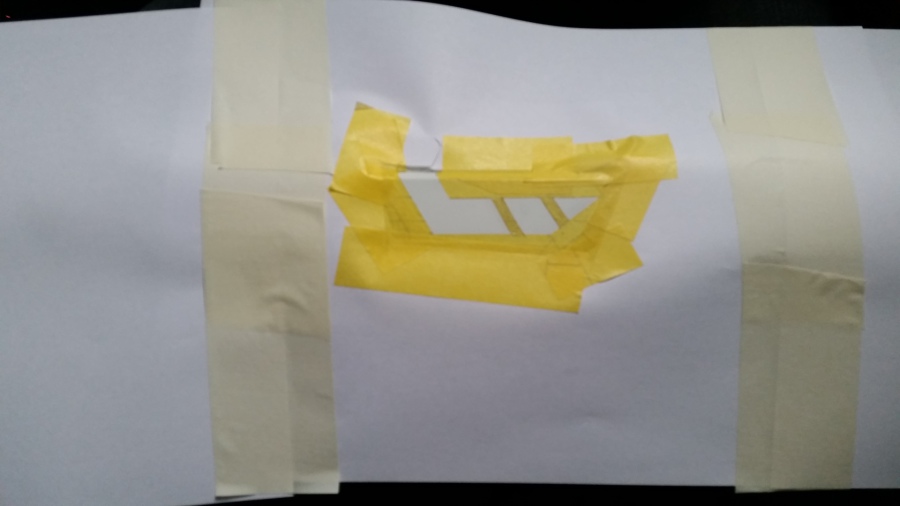
And now to cut out the stencils for the staggered orange stripe the run down from the orange line above. The picture below shows the measuring used to get this accurate. I used a protractor against the picture of the Asiimov from CS:GO (the one at the top of this page) to try to get this angle as accurate as possible.
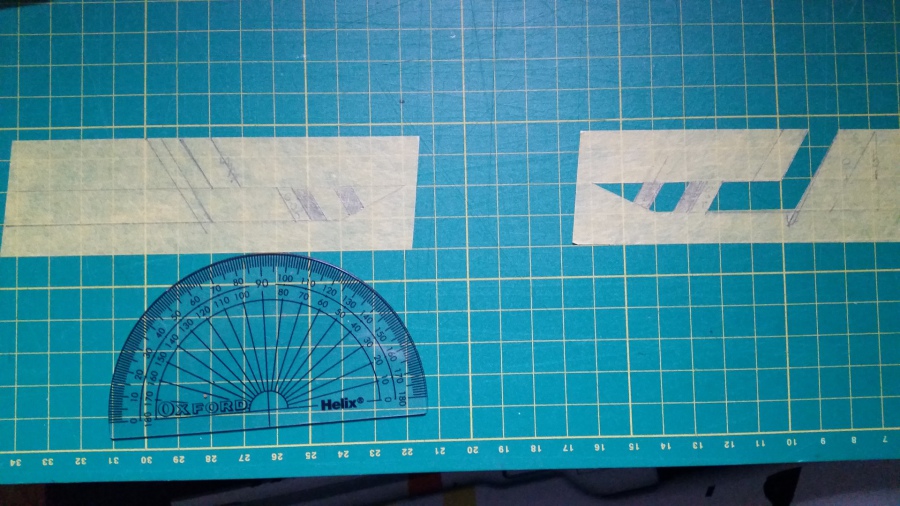
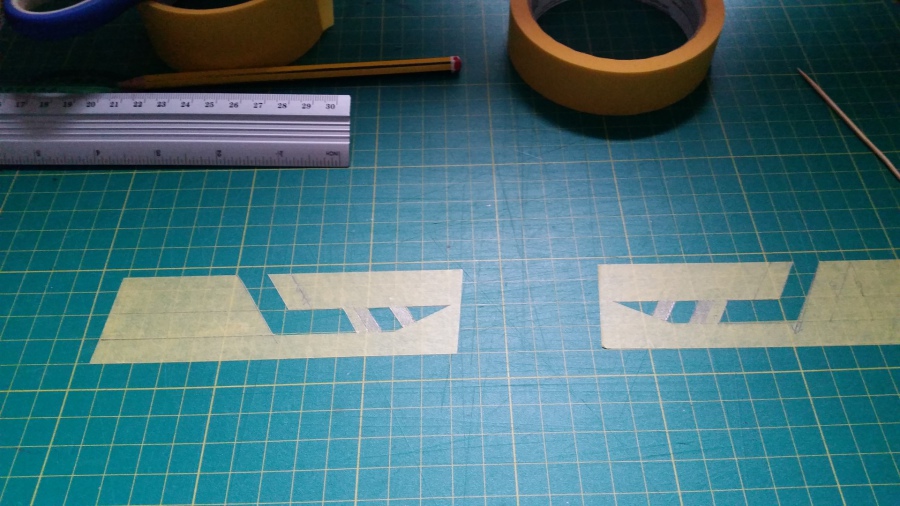
Both stencils now cut out with nice, clean lines measuring exactly the same.
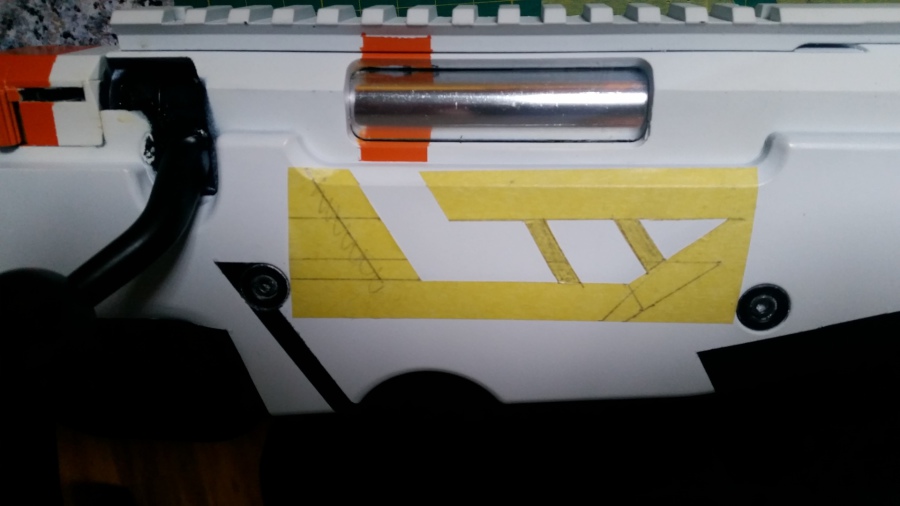
Here is the stencil on the body. More masking tape needed to link the final part of the top of the body to the orange on the barrel.
Another layer of masking tape as I will be spraying on this stripe. As any orange paint getting on any other part of the white body will ruin the look, I've used 3 pieces of A4 paper taped together to act as protection from spray.
And here is is with only the final, original later of masking tape left on.

And here is the body with all painted completed. Just a few details left to do...
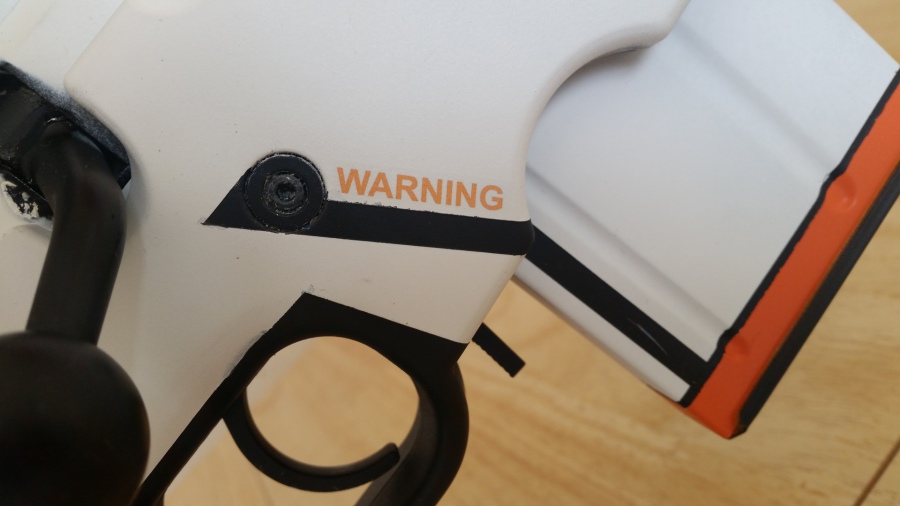
The final step is to add a few decals to finish off the detailing. These were printed out on transparent transfer paper, printed out, sprayed with sealer and then transferred on. This is a nice easy 'warning' just in front of the trigger.
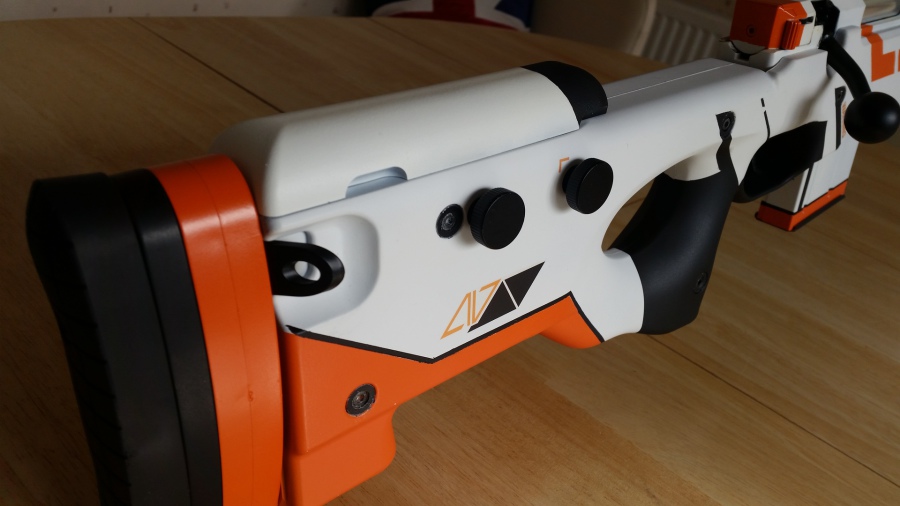
The other decals are at the rear of the rifle, two orange markers idenitfy the front screw for the cheek rest riser. Below that is I imagine the logo for the Asiimov; a very cool angled design.
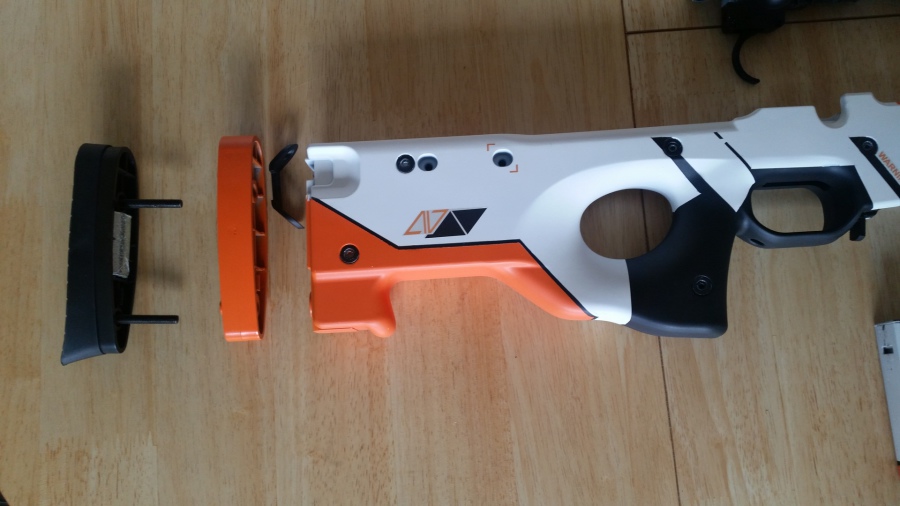
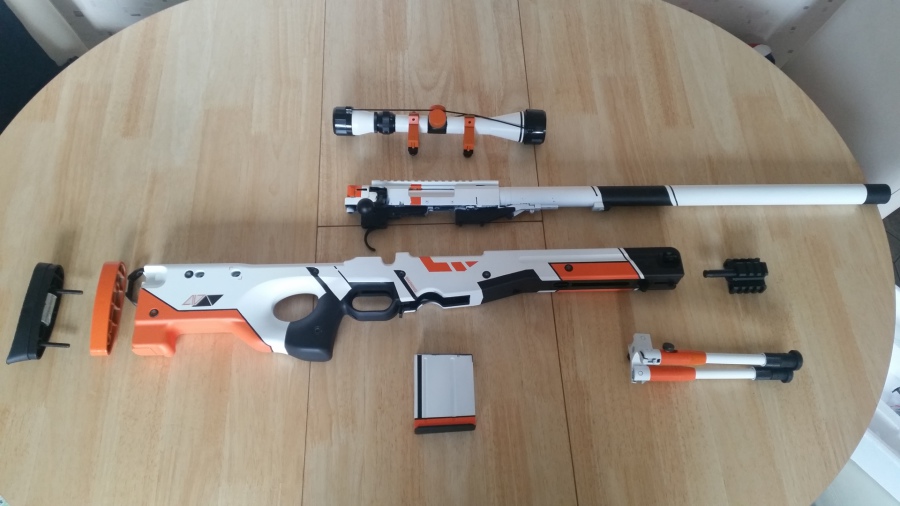
Here are all the individual parts together again. Note I also painted the inner stock extender orange but left the original black rubber. I also left the forward bipod rail in its stock black. Now painting is all complete, they will need to be sprayed with a paint sealer to help protect the paint from chipping off. I sprayed two layers of sealer, giving 24 hours between each coat.
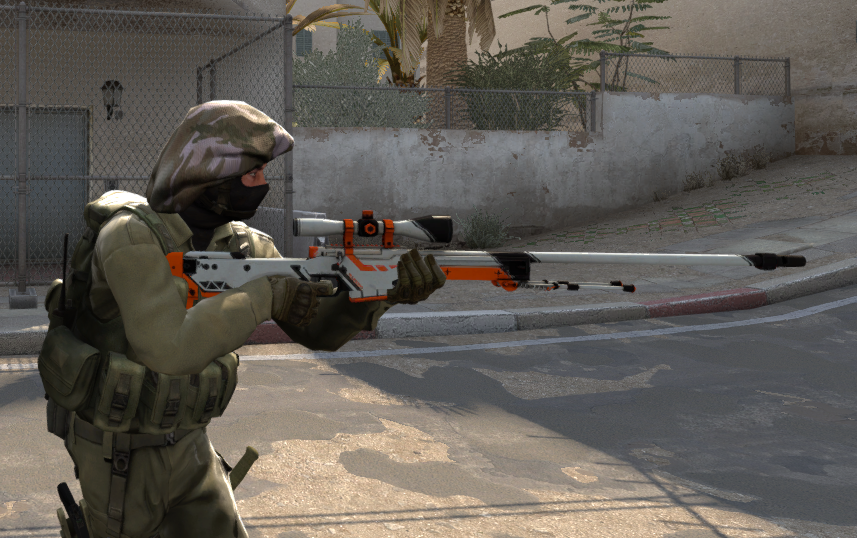
And here is the Asiimov rifle in the game...

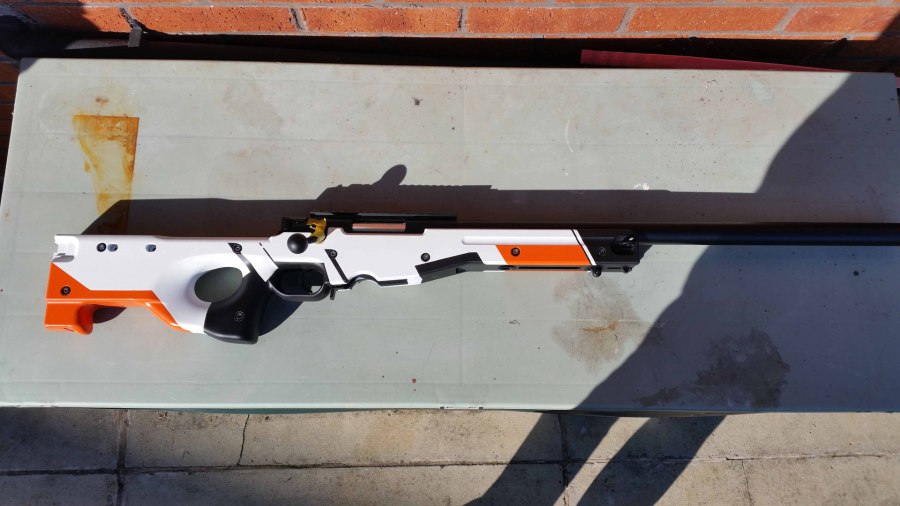
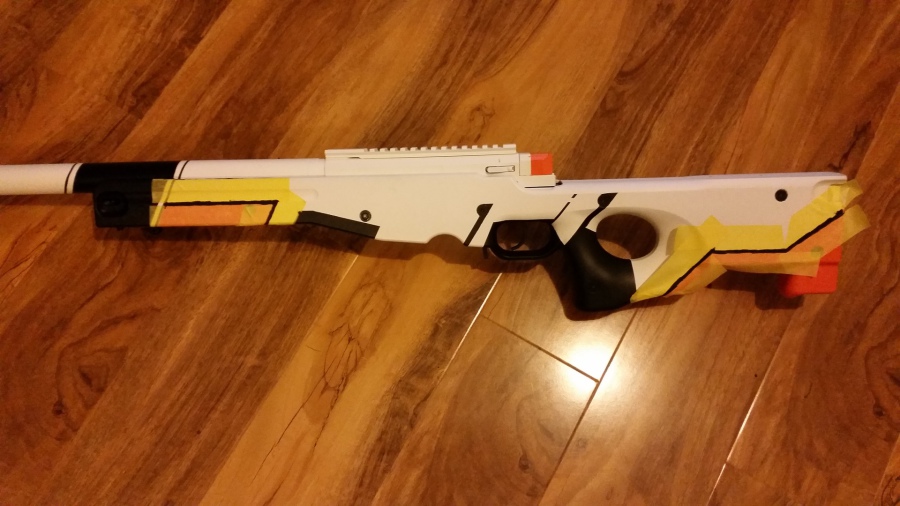
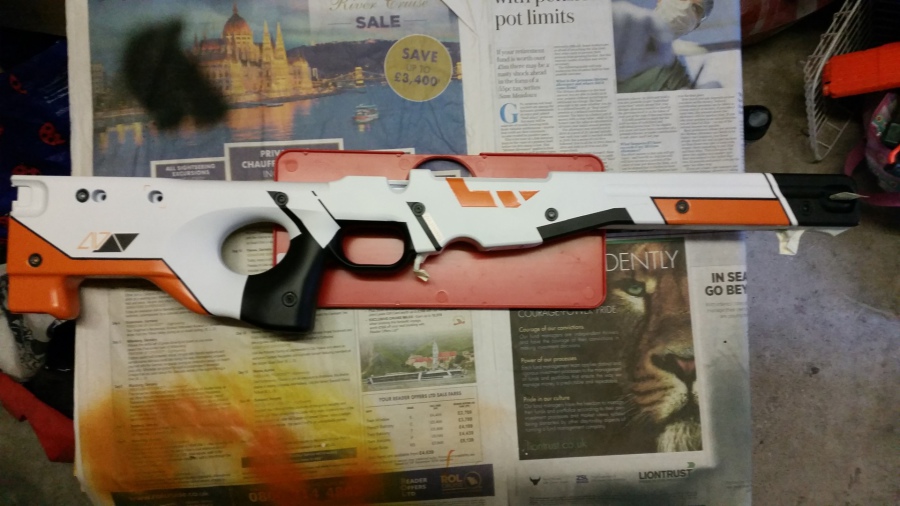
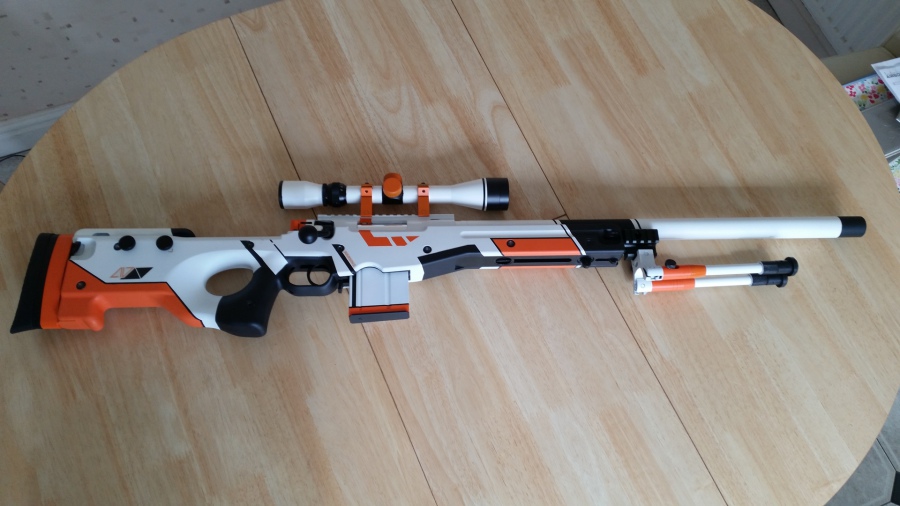
And here is the completed rifle.
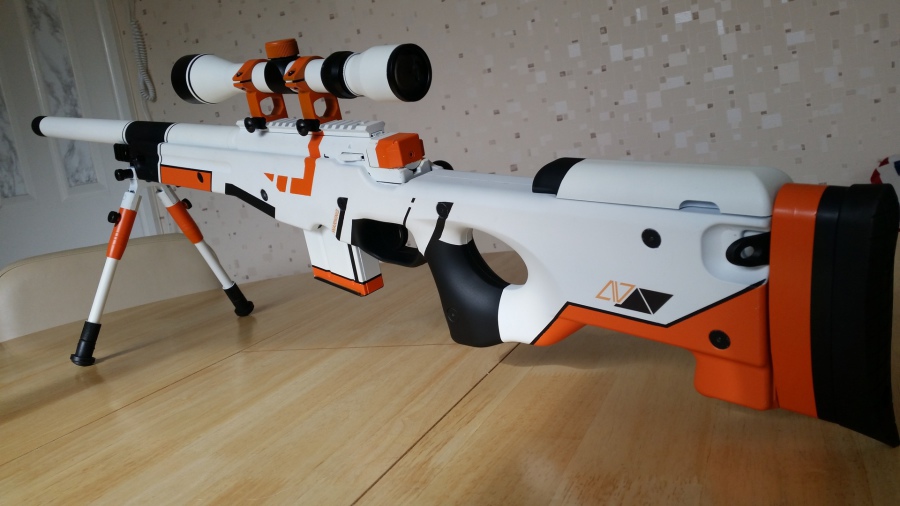
Front look at the completed Asiimov.
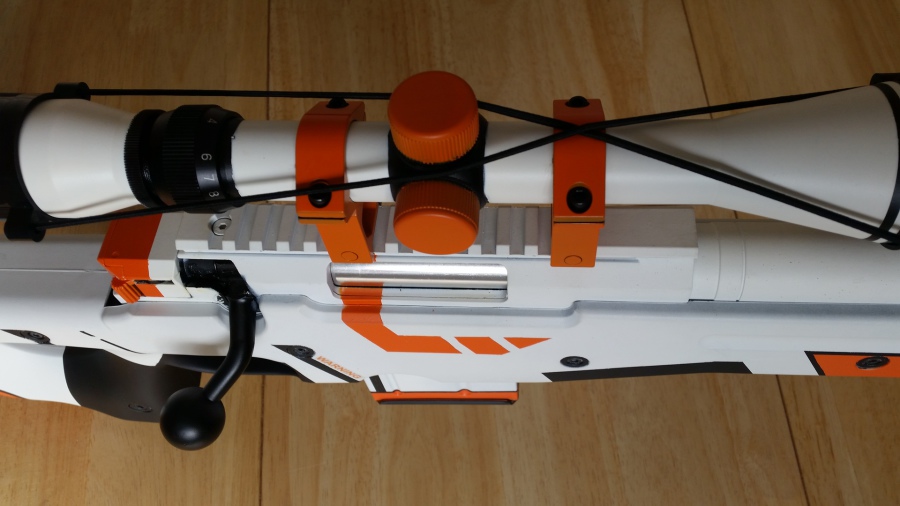
Close up of the orange stripe running down from the rear scope rail, down the rail, broken up by the ejection port and continuing down and across the body.
Close up of the decals, rear stock, sling point, rear cheek riser and its screws.
Close up on the front sling point, bipod rail and bipod. Also another good closeup of the paint detailing on the front of the barrel that matches up and runs down the body.
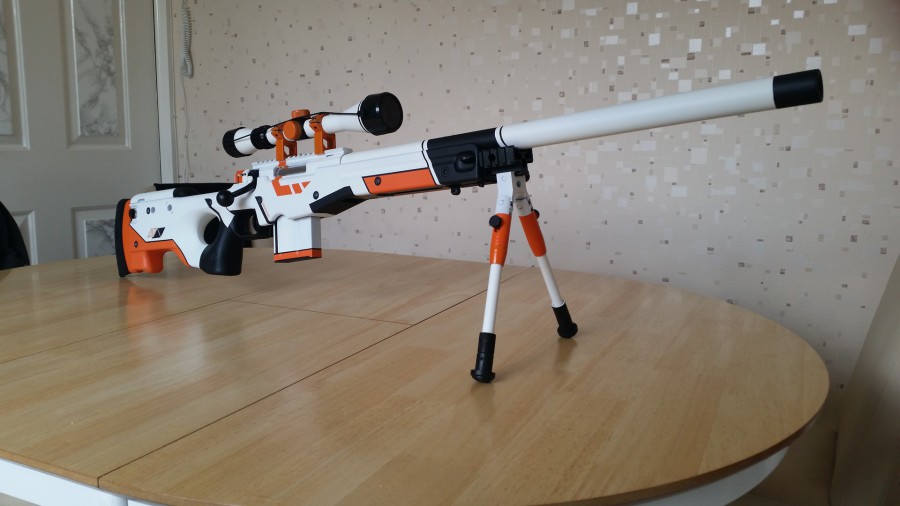
And here it is with the bipod folded forward.
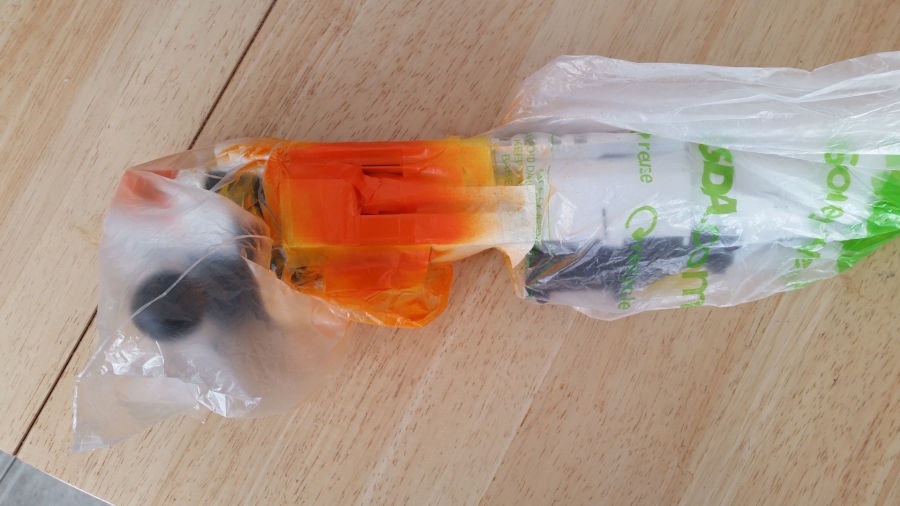
And here it is, all packed up ready for delivery to its new owner. As I said earlier, the most nerve racking project I have ever worked on but the result looks amazing. A real world AWP Asiimov!